 Mathematics: Geometry
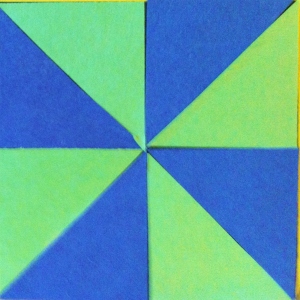
Quilt Block Symmetry
By: Lauren Nixon
Lesson 9 of 10
Time Allotted: 50 minutes
Goals
3: Use attributes and properties of two-dimensional shapes to solve problems including applications involving parallel and perpendicular lines, congruence, symmetry, and perimeter (3.3.8 Common Core).
Objectives
3.1 Following a lesson on symmetry, students will be able to identify how many lines of symmetry their quilt block has and place their quilt block on the classroom chart, correctly.
3.2 Following a lesson on symmetry student will be able to draw the lines of symmetry of shapes on their Symmetry worksheet, 7 out of 9 times.
Pre-Request knowledge
No pre-request knowledge required. Quilt blocks need to be made at least a day before the lesson.
Materials
• Exploring Symmetry in Quilt blocks (overhead 4.16 from Bridges)
• Quilt blocks students made before lesson (Have premade quilt block extras for students that were absent)
• Five 3X5 index cards labeled with number 0 thorough 4
• A ruler
• A yard stick
Procedure
| Time |
Procedure: The teacher does… |
Procedure: the students do… |
| 5 min. |
A. Anticipatory set
- The teacher asks the students to sit where they can see the overhead and explains that they will do some work with symmetry today and asks if anyone knows what symmetry means.
- The teacher shows the top part of overhead 4.16 and asks the students to study the shapes. And ask what they notice?
|
A. Anticipatory set
- Students think about what the word symmetry means drawing from their prior knowledge.
- Students study the overhead and volunteer what they notice about the shapes.
|
| 10min. |
B. Teaching
- The teacher explains that to find a line of symmetry students can use the fold test. The teacher demonstrates with the overhead and shows how the shapes and colors match.
- The teacher then displays example quilt blocks one at a time and has the students find the lines of symmetry by coming up to the document camera and showing how they found the lines of symmetry.
- Once the teacher goes through all four quilt blocks the teacher hands back the students’ quilt blocks and instructs them to find the lines of symmetry of their own quilt block. The teacher encourages the students to work together.
- Once students have determined how many lines of symmetry their own blocks have, the teacher asks them to set their blocks in the appropriate columns of a floor graph.
|
B. Teaching
- Student look at the quilt blocks on the document camera and find how many lines of symmetry the quilt block has.
- Students make observations and listen to their peers observations of the quilt blocks
- Students look at their own quilt blocks and find how many lines of symmetry they have.
- Students work with their table group partners to help with finding lines of symmetry.
- Students place their quilt blocks on the class graph at the back of the classroom.
|
| 15 min. |
C. Group Application
- When the students finish placing their blocks, the teacher has the class form a circle around the graph. The students share their observations.
- The teacher has the speaker point out their observations with a yardstick.
- Student will more than likely shift blocks to different columns as they notice that some blocks have more or less lines of symmetry.
|
C. Group Application
- Students make observations and justify their thinking to the class.
|
| 15 min. |
D. Individual Application
- After the graph discussion the teacher directs the students back to their seats and has the students work on their Symmetry worksheet.
- The teacher monitors the students’ progress and answers any questions
|
D. Individual Application
- Student work on their own on their Symmetry worksheet, finding all the lines of symmetry a shape has.
|
| 2 min. |
E. Closure
- The teacher informs the class that they will work with symmetry more the following day and their quilt graph will be put on to paper so that they can continue to make changes to it if needed.
|
E. Closure
- Students listen to the instructor.
|
 Mathematics: Geometry
